Table of Contents
Key Takeaways
- Setup with shoulder blades squeezed and feet planted for a stable, safe press.
- Use a grip width that keeps wrists straight, typically 20-24 inches for most lifters.
- Maintain a moderate arch (1-2 inches) to shorten range of motion and protect shoulders.
- Lower the bar to nipple level with elbows at 45 degrees for optimal bar path.
- Apply progressive overload by adding 2.5-5 pounds per session and deloading every 4-6 weeks.
The Critical Setup Sequence
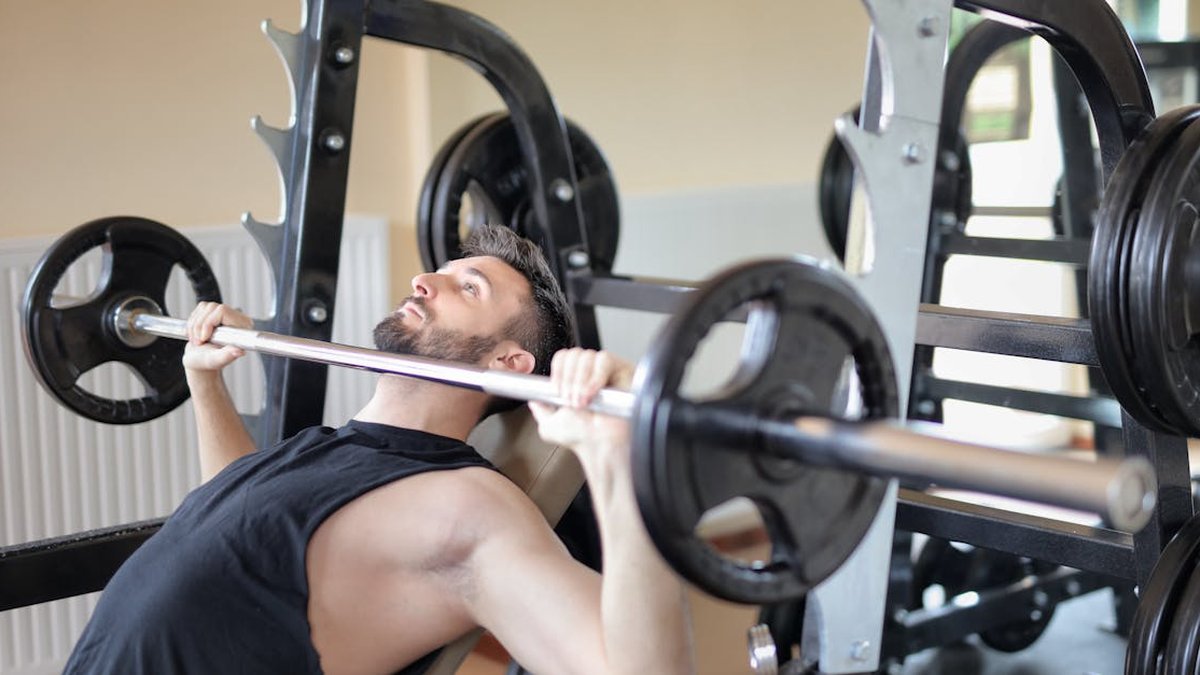
Before touching the bar, your setup determines 80% of press success. Lie on the bench with your eyes directly under the barbell. Squeeze your shoulder blades together and pull them down toward your hips. This creates a stable platform and protects your shoulders. Place your feet flat on the floor, directly under your knees. Drive your heels into the ground and push your hips slightly upward to create tension. Maintain this tension throughout the lift. Unrack the bar with straight arms, then lower it under control. A proper setup takes 10-15 seconds but transfers directly to heavier, safer lifts.
Grip Width and Wrist Alignment
Grip width directly affects which muscles are emphasized. A standard grip places your hands slightly wider than shoulder width, about 20-24 inches apart. This targets the entire chest evenly. A wider grip (26-30 inches) increases pectoral stretch and recruits more chest fibers but reduces triceps involvement and increases shoulder strain. A narrower grip (16-18 inches) shifts load to triceps and inner chest. For wrist safety, the bar should sit directly over the forearm bones. Do not bend your wrists back. Wrap your thumbs around the bar, not a false grip. Test your grip by pressing the bar off the rack and holding for 2 seconds. If your wrists flex, adjust inward or outward until they remain straight.
“Consistency is the real secret to fitness progress. A so-so workout you actually do is infinitely better than a perfect workout you skip.”
Creating and Maintaining the Arch
The arch is not a backbend — it is a controlled thoracic extension that shortens the range of motion and protects the shoulders. To create an arch, start by pulling your shoulder blades together and down. Push your chest toward the ceiling while keeping your glutes and upper back in contact with the bench. The arch should be moderate: your lower back should clear the bench by 1-2 inches. Excessive arching (bouncing the bar off your chest) is illegal in powerlifting and dangerous for the lumbar spine. Practice the arch during warm-ups with an empty bar. Use leg drive to push your body into the bench, not to lift your hips. A stable arch allows you to press heavier loads with less shoulder strain.
Bar Path and Touch Point
The bar path is not vertical. Lower the bar to your lower chest, approximately at nipple level, not your neck or stomach. The elbows should angle at roughly 45 degrees from your torso, not flared out to 90 degrees. As you press, the bar should travel slightly back toward your face, finishing directly over your shoulders. This diagonal path maximizes mechanical advantage and reduces shoulder impingement. Touch the bar to your chest with control. Do not bounce the bar off your ribcage. A controlled pause of 1-2 seconds at the bottom (touch-and-go for hypertrophy, paused for strength) ensures muscle tension stays on the chest, not on momentum. Paused reps increase time under tension and build raw pressing power.
Common Mistakes and Corrections
Three mistakes plague most lifters. First, flaring elbows at the bottom. This stresses the shoulder joint and reduces pressing power. Correct by keeping elbows at 45 degrees. Second, bouncing the bar off the chest. This uses momentum and reduces muscle activation. Perform paused reps with a 1-2 second hold at the bottom. Third, losing leg drive during the lift. Many lifters set their feet but relax their legs mid-rep. Keep your feet planted and actively push through your heels. For each mistake, use the corresponding drill: pause reps for bounce, band presses for elbow control, and board presses for leg drive. Fixing these errors can add 10-20 pounds to your bench within 4-6 weeks.
“Your body adapts to what you consistently ask of it. If you want change, you must demand it through progressive effort, not wishful thinking.”
Breathing and Bracing Techniques
Proper breathing stabilizes your torso and increases press force. Before unracking, take a deep belly breath and hold it. Lower the bar while holding that breath. At the bottom, press the bar up and exhale forcefully only after passing the sticking point (usually 2-4 inches off the chest). This is called the Valsalva maneuver. It increases intra-abdominal pressure, protecting your spine and providing a stable base for leg drive. Do not hold your breath for more than 3-4 seconds per rep. Between reps, take 2-3 normal breaths to avoid dizziness. For heavier sets above 85% of your 1RM, use a belt to further increase bracing pressure. Practice this breathing pattern with warm-up sets until it becomes automatic.
Progressive Overload and Programming
To build bench press strength, apply progressive overload systematically. Increase weight by 2.5-5 pounds per session for 4-6 weeks, then deload by 10% for one week. Use a linear progression model for beginners: 3 sets of 5 reps, adding weight each session. For intermediates, use periodization: 4 sets of 6-8 reps at 70-75% for volume, then 5 sets of 3-5 reps at 80-85% for intensity. Program bench press 2-3 times per week with at least 48 hours between sessions. Include accessory work: overhead press for shoulder strength, rows for back stability, and triceps extensions for lockout. Track each session's weight, reps, and RPE (rate of perceived exertion). Aim for an RPE of 8-9 on working sets, meaning you have 1-2 reps in reserve.
Frequently Asked Questions
Common questions about strength training
Should I touch the bar to my chest on every rep?
Yes, controlled touch is essential for full range of motion and muscle activation. Bouncing the bar off your chest reduces effectiveness and increases injury risk. Pause for 1-2 seconds at the bottom for strength gains.
Is it okay to arch my back during bench press?
A moderate arch (1-2 inches) is safe and recommended for shoulder protection and mechanical advantage. Excessive arching that lifts your glutes off the bench is dangerous and illegal in powerlifting. Keep your glutes and upper back in contact with the bench.
How wide should my grip be for bench press?
A standard grip is slightly wider than shoulder width, about 20-24 inches. Wider grips emphasize chest but increase shoulder stress. Narrower grips target triceps. Choose a grip that keeps your wrists straight and feels stable.
How often should I bench press to increase strength?
Train bench press 2-3 times per week with at least 48 hours of recovery between sessions. Use a mix of heavy (3-5 reps) and volume (6-10 reps) days. Include accessory exercises like overhead press and triceps extensions for balanced development.
Related Articles
Start Today
The bench press is a technical lift that rewards patience and attention to detail. By nailing your setup, grip, arch, and bar path, you will press heavier weights with less shoulder strain and more consistent progress. Apply the progressive overload principles and accessory work outlined here, and track every session. Strength comes from small, precise improvements repeated over time. Use the table and drills in this guide to structure your next bench press workout. With disciplined practice, you can add 20-40 pounds to your bench within 8-12 weeks.